Tuesday 22 December 2015

Garden Checklist & Merry Christmas!

Good Morning!
Even though it's the Festive season there are still little things you can be doing in the garden.
Oh and I know this post is a day late ... let's blame it on the festivities lol

1. Planting - The ground is still warm due to the unseasonal weather so you still have chance to plant or relocate any shrubs, roses, trees and hedges. This is also a good chance to check any plants that are currently needing support if you are experiencing windy weather too!

2. Winter Pruning - If your looking for a few jobs to do this side of Christmas then giving your Acers, Birches and Vines a prune is a good thing to do! Pruning will allow you to to create shape and get rid of any dead bits.

3. Summer Flowering Bulbs  - I know that Summer is the last thing on everyone's minds with Christmas in just a few days, but why not start deciding which Summer flowering bulbs
(such as Dahlia's and Gladioli) that you'd like next year whilst the widest choice is available. 
Also if you haven't done so already, order next years seeds!
The sowing season will soon be upon us!
Dahlia 'Cafe Au Lait' from my garden in 2014

4. Lawns - Keep off your lawns in frost and wet weather as walking over the grass can damage the grass and result in unsightly patches.

5. Greenhouse - With the extremely mild weather, Botrytis (Grey Mould) can be more of a problem undercover in GH's that have insulation as ventilation isn't as good as when your GH isn't insulated. Make sure you check your plants daily, I have been finding newly affected plant material each time I take a look and remove any of the diseased material straight away. When watering make sure you do it sparingly and try not to catch any of the plants foliage to limit infection.

6. Climbing Plants - Plants such as Ivy, Virginia Creeper and other climbers that are growing on houses can have a little trim if they are approaching windows and guttering. Also check that Climbers elsewhere in the garden are tied into their supports.

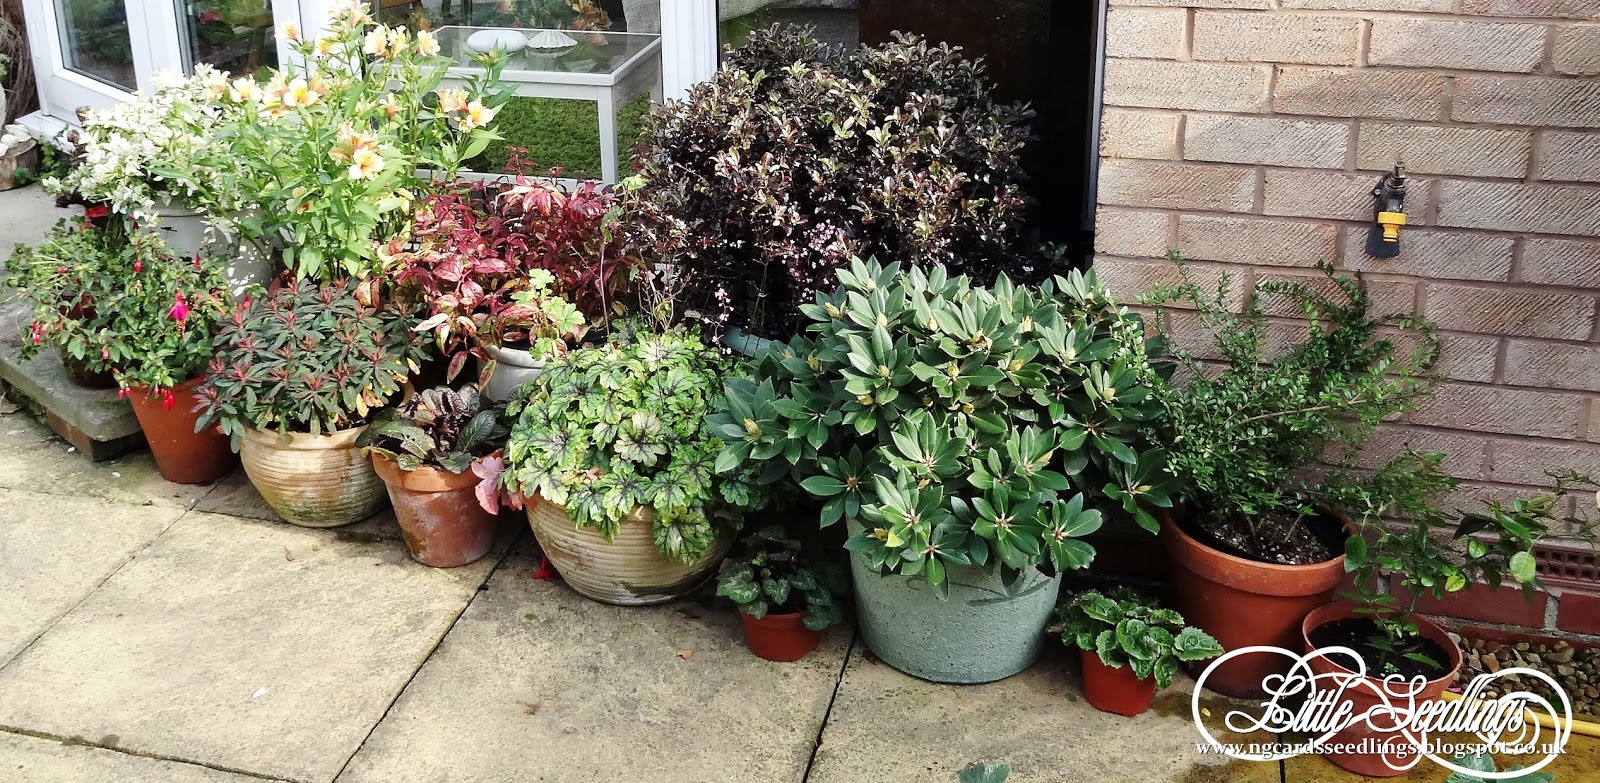
7. Autumn / Winter Bedding - Check over any bedding that you have for signs that it is past it's best. Most of my Viola's were looking tired and had caught Black Spot this week so it was time to transfer them to the compost bin! Replace any tired plants with fresh bedding or winter flowering shrubs ... a perfect excuse for a trip to the garden centre! 
As mentioned in my last checklist Primroses can be instantly cheered up by removing fading / discoloured leaves and dead - heading. 

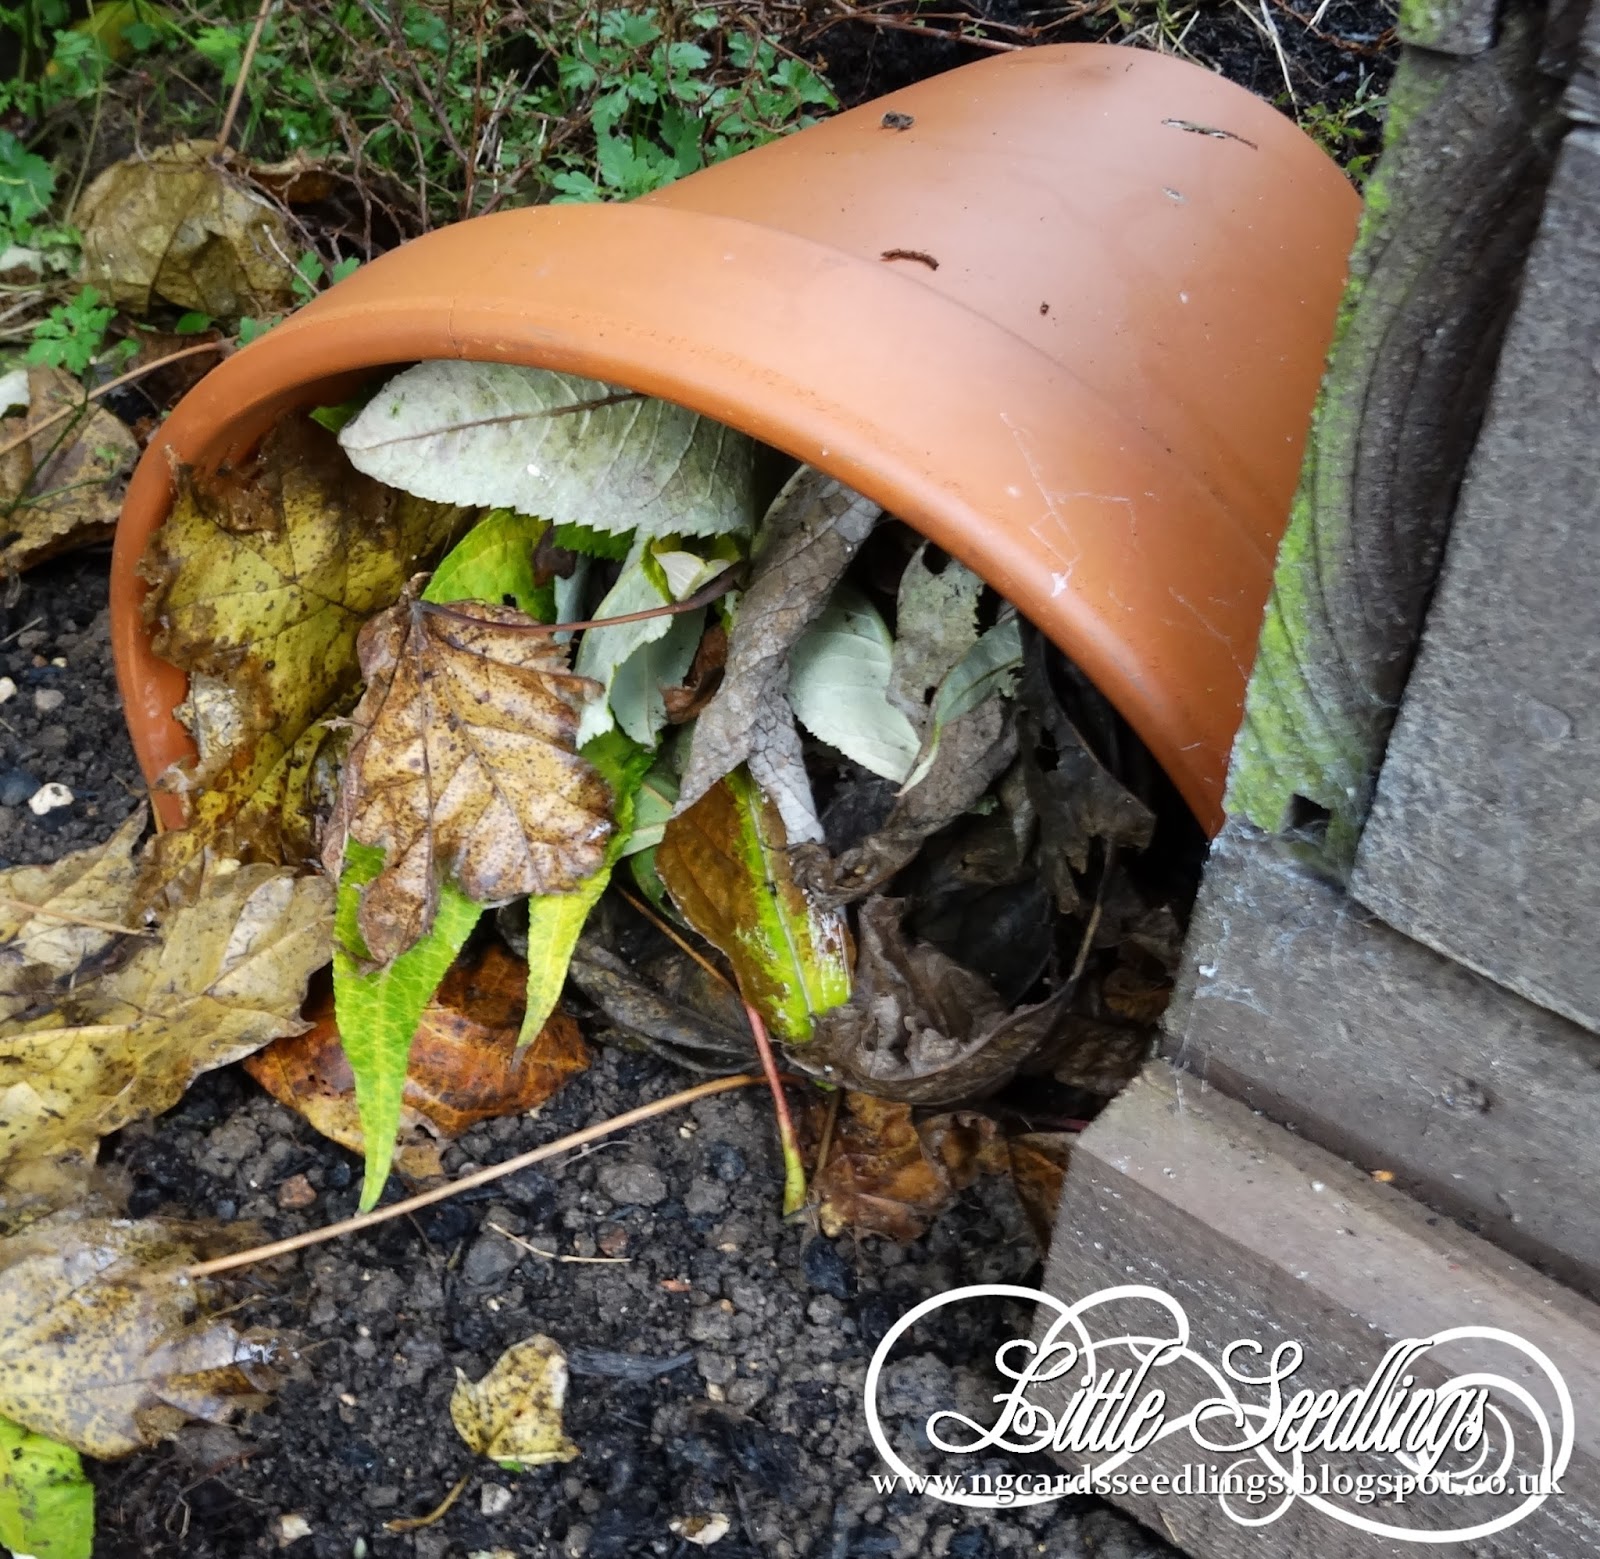
8. Clean Up - Finally if you don't have any of these jobs above to do, keep up with clearing any fallen leaves on lawns and ponds to reduce the spread of disease and give any dirty pots and trays a good clean, it's not the most exciting job but when it comes to sowing seeds and potting on next year good plant hygiene is a must for successful growing!

Thanks for stopping by and I hope you all have a wonderful Christmas!
For as long as you keep reading I shall be back with the Checklist & Problem Area posts next year along with some more snaps of my Garden, Plants and other Gardening topics next year ... 

HAPPY GROWING!
XXX

Friday 18 December 2015

Problem Area - Plant Pests ... Lily Beetle!

Good Morning!
Welcome to my next post related to Problem Areas. Currently I am focusing on Pests!
What exactly is a Plant Pest? 
A Plant Pest gains it's nutritional requirements from the host plant it feeds upon. 
There are various ways which it can gain it's sustenance but broadly speaking it either eats or sucks a plant's sap.
It's a good idea to take note of a pests life cycle as they are more vulnerable at certain stages.

LILY BEETLE
As the name suggests these are common pests to Lillies and Fritillaries and are distinguishable by their red colouring. As you can see from my photo below the adults can be found on and near other plants but it's only on Lillies and Fritillaries that their eggs are laid and grubs develop upon.


A LITTLE BIOLOGY
Lily Beetles or Red Lily Beetles as there otherwise known overwinter as adults under the soil, leaves and other sheltered places. This can be anywhere and not always near the plants that they favour. The beetles emerge on sunny days during March / April time when they start to look for foliage on host plants. Adults lay their eggs on the underside of leaves from April to mid - summer which hatch and the larvae then feeds on the foliage. When fully fed the larvae will go under the soil to pupate and emerge as adults during the summer. There is only one generation per year so unlike other pests these new adults will not mate until the following year.

SYMPTOMS
Foliage on Lillies and Fritillaries is eaten away by the grubs hatched from eggs on the underside of leaves. The eggs are in clusters of orange/red and are sausage shaped, the larvae are about 6-8mm long and reddish brown, usually covered in their own black excrement. These grubs usually graze on the underside of leaves, resulting in dry white / brown patches and older grubs can devour whole leaves starting at the tips working back towards the stem.
Adults make rounded holes in the leaves when feeding and will also feed on petals & seed pods.
These attacks in Summer can lead to undersize bulbs developing which can hinder flowering the following year.

Lily Beetle Larvae Photo from Google.

Adult Lily Beetle Photo from Google.

CONTROL
If like me you like to garden Organically there are a few things you can do -
* Pick off and remove the pests as soon as you spot them.
If you only grow a few of these plants start inspecting them regularly from March onwards for any signs of the pest.
* Grow a variety that is claimed to be Lily Beetle tolerant -
Lillium (Lily 'Defender Pink').

There is also Chemical control available however please note that if you choose to use this please avoid spraying on plants in flower to avoid harming any innocent pollinating insects.
These products are also usually only beneficial on the young newly hatched larvae rather than the adults.

I hope you have found this interesting and helpful if any of you come across this particular pest!
HAPPY GROWING!
XXX

Friday 11 December 2015

Problem Area - Plant Pests ... Eelworms, Slugs & Snails!

Good Morning!
Welcome to my next post related to Problem Areas. Currently I am focusing on Pests!
What exactly is a Plant Pest? 
A Plant Pest gains it's nutritional requirements from the host plant it feeds upon. 
There are various ways which it can gain it's sustenance but broadly speaking it either eats or sucks a plant's sap.
It's a good idea to take note of a pests life cycle as they are more vulnerable at certain stages.

STEM / BULB EELWORMS
These can be particularly problematic to the roots, tubers, bulbs leaves or stems of a plant.
This is most common between the months of March - May.
One of the tell tale signs is that the plant growth is stunted and foliage has a chlorotic (yellow/green) appearance that may appear wilted / droopy.
Narcissus bulbs are particularly susceptible and may be come soft when infected.
These can be hard to find as they live inside the tissue of the plants / bulbs and can only be seen with a microscope. However if you cut a bulb in half and can see tell tale signs of brown rings without any sings of maggots then you can see that this pest is present.
To get rid of this disease you need to dig up and dispose of any affected bulbs and any others that may not even seem affected in a 1m radius as the eelworms can spread via leaf contact or the soil if left untreated.

Photo from RHS

CONTROL
If like me you like to garden Organically there are a few things you can do -
* Always ensure that you buy good quality, firm bulbs and check them all before planting.

SLUGS & SNAILS
Pretty much everyone, gardener or not can identify these two pests in their gardens. They can cause damage all year round to plants but they are most problematic in the Springtime to seedlings and emerging young growth.


Photo's from RHS

A LITTLE BIOLOGY
Slugs are soft bodied molluscs that mostly feed at night and leave tell-tale slime trails which can alert you to where they may be. They can vary in size and colour and they live on or just below the soil surface. Unlike snails, slugs remain active throughout the year, even more so in milder, wet conditions and reproduction happens mostly in the Spring and Autumn.

Snails are easy to spot because of their shells, are less common on acid soils and can move more freely over dry terrain than slugs.
As I mentioned above Snails are dormant in late Autumn / Winter time often clustering together in protected areas. Reproduction also occurs mostly in the Spring and Autumn.

SYMPTOMS
A great deal of damage can be caused by these pests as they will eat the soft tissues of leaves, stems and roots and can climb up to a fair height above ground level. Most of the damage will be done at night, especially to seedlings and young plants.
The slime they produce can reduce the quality of your crops and lead to fungus / rot.

Photo from Google.

CONTROL
If like me you like to garden Organically there are a few things you can do -
* Pick off and remove the pests after nightfall when they are easier to find.
* Ensuring that valuable or young plants have physical barrier.
* Grow on any young plants so that they have good strong, healthy growth before planting out.
* Turn over any hiding places for predators (e.g. birds) to find.
* Growing Plants known to be less likely to be eaten, there are quite a few varieties that can be found over on the RHS website.
* Biological control can be gained against slugs by the use of Nematodes.
There is also Chemical control available.

I hope you have found this interesting and helpful if any of you come across this particular pest!
HAPPY GROWING!
XXX

Monday 7 December 2015

Garden Checklist ...

Good Morning!
Along with the few things I mentioned over the past couple of weeks, there are a couple of other bits and bobs you can be getting on with in the garden too.

1. Primroses - If like me, you have Primroses in your garden you may have noticed that in the past week or so the leaves are looking a little worse for wear. Give your Primroses a tidy up by removing any yellowing / damaged leaves along with faded flower heads. You can also divide Primroses if they are becoming congested. This job will only take half an hour or so and the finished look is much more appealing to look at!
The same can also be done to Hellebores if any of the leaves are showing signs of Black spot.


2. Winter Bedding - If you have any pots of Winter Bedding and the temperatures are set to get really cold, move the pots to a sheltered position until the temperatures improve.
We've had lows down to 1c at the start of last week and highs of 11c last weekend!
You can also use Cloches to protect any Winter Veg that you may be growing.

3. Asparagus  - If you are growing Asparagus in your garden now is the time to cut down the plants, the same can be done for the tops of Jerusalem Artichokes.

4. Greenhouse - Over in the Greenhouse along with the usual checking over of plants for signs of pests & diseases, you can bring pots of bulbs under cover to force them to produce early blooms, resulting in some Winter colour for your GH or inside your home. 

5. Houseplants - Finally if you have any Houseplants on your windowsills and temperatures are set to get low over night, move them out of the window in the evening to help keep them at a more suitable temperature.

Thanks for stopping by, don't forget you can find all the previous Checklists on the page tab above.
HAPPY GROWING!
XXX

Friday 4 December 2015

Problem Area - Plant Pests ... Rabbits!

Good Morning!
Welcome to my next post related to Problem Areas. Currently I am focusing on Pests!
What exactly is a Plant Pest? 
A Plant Pest gains it's nutritional requirements from the host plant it feeds upon. 
There are various ways which it can gain it's sustenance but broadly speaking it either eats or sucks a plant's sap.
It's a good idea to take note of a pests life cycle as they are more vulnerable at certain stages.

RABBITS
To the non gardener these may not seem that problematic, however those that do garden know how much damage these balls of fluff can cause!
You may think that Rabbits only cause damage in gardens out in the countryside but 2 years ago my garden was visited by a rabbit and I live in a cul-de-sac situated within a town.


A LITTLE BIOLOGY 
The main breeding season for Rabbits is between January - May but they can be produced throughout the year. An average litter consists of between 3 - 6 young. Females can become pregnant again after just 1 day from giving birth and produce up to 5 litters a year. 
Rabbits often live together in colonies known as warrens. 

SYMPTOMS
Damage from this pest to our plants can be done to a wide range of plants. One of the most common signs that you have a problem with Rabbits is the damage they can cause to young Tree's, such as ring barking (see photo below). It's also worth noting that plants that aren't susceptible to Rabbits at maturity can be when they are at a young growing stage and eaten away.


Photo's from Google & RHS.

CONTROL
If like me you like to garden Organically there are a few things you can do -
* Young Tree's can be protected by using Tree Guards / Tree Shelters.
* Ensuring that valuable or young plants have physical barrier.

* Growing Plants known to be 'Rabbit Proof' such as -
Monksood - Acontium carmichaelii 'Kelmescott'
Lily - of - the - Valley - Convallaria majalis
 Day Lily - Hemerocallis atrina
Michaelmas Daisy - Aster amellus 'King George'
                                     Aster cordifolius 'Silver Spray'

                                    Aster novi-belgii 'Royal Ruby'
Crane's Bills - Geranium himalayense
                                           Geranium endressi 'Wargrave Pink'
Japanese Anemone - Anemone hupehensis var. japonica

There is also Chemical control available in the form a repellent spray, which may need to be re-applied after rainfall.

I hope you have found this interesting and helpful if any of you come across this particular pest!
HAPPY GROWING!
XXX

Monday 30 November 2015

Garden Checklist ...

Good Morning!
Here are a few things you can be getting on with over the next week in your garden.

1. Apple Trees - If you are growing Apple Trees and they need a bit of a tidy up, winter is the ideal time to give them a prune. You can also prune any Autumn fruiting Raspberries to soil level now too.

2. Tools - With the gloomy weather not everyone wants to go outside, if that sounds like you then now is a good time to clean and sharpen any gardening tools.

3. Perennials  - If you don't like the look of dead flower stems over winter cut down any faded stems now and clear away. Whilst doing this keep an eye out for any pests hiding under fallen leaves.

4. Botrytis - Just like I suggested last week, keep checking for any signs of grey mould and act straight away. Remember to water sparingly too which will help prevent this spreading.


Thanks for stopping by, don't forget you can find all the previous Checklists on the page tab above.
HAPPY GROWING!
XXX

Friday 27 November 2015

Problem Area - Plant Pests - Glasshouse Whitefly!

Good Morning!
Welcome to my next post related to Problem Areas. Currently I am focusing on Pests!
What exactly is a Plant Pest? 
A Plant Pest gains it's nutritional requirements from the host plant it feeds upon. 
There are various ways which it can gain it's sustenance but broadly speaking it either eats or sucks a plant's sap.
It's a good idea to take note of a pests life cycle as they are more vulnerable at certain stages.

GLASSHOUSE WHITEFLY
As the name suggests this pest is most commonly found under glass, although they can be found on plants outside. If left untreated this pest can cause havoc to your plants and is pretty common in all of our gardens.

Photo from RHS.

A LITTLE BIOLOGY 
The Glasshouse Whitefly can breed continuously under cover, the eggs can develop into adults within 3 weeks, a little longer in the Winter. They prefer warm conditions which is why they are most prevalent under cover. 

SYMPTOMS
Damage from this pest to our plants is caused by their piercing mouthparts which withdraw large quantities of sap from plants. This causes mottling to the foliage, yellow discolouration and wilting. If the pest is left to breed and form large quantities the affected plants may be killed.
The pest can also produce a sticky substance on the host plant which can help us gardeners identify them.
Plants that are more susceptible than others are Tomatoes, Cucumbers, Primulas, Dahlia's, Chrysanthemums and Calceolaria (Ladys Purse).

Photo from Google.

CONTROL
If like me you like to garden Organically there are a few things you can do -
* Maintaining good plant hygiene by removing any affected foliage straight away
* Hanging Yellow Sticky Traps under glass - please note that this can however catch the good guys along with the pests.
* Constant checking of plants to remove the pest at first sight

* Biological control can be gained by the introduction of a parasitic wasp (these can be purchased via mail order) at first indication of the pest.

There is also Chemical control available.

I hope you have found this interesting and helpful if any of you come across this particular pest!
HAPPY GROWING!
XXX

Monday 23 November 2015

Garden Checklist ...

Good Morning!
Here are a few things you can be getting on with over the next week in your garden.

1. Frozen Water - If you have any ponds then keep an eye out for them freezing over in these lower temperatures, if left frozen they can cause problems for any fish or plants under water and also wildlife looking for water If your pond does freeze over then gently break the ice as soon as you notice it, you can also float items such as a tennis ball or polystyrene on top which helps prevent the whole surface freezing and can easily be removed if it does to provide an area of open water.
TIP - Keep an eye on Birdbaths too for freezing over.


2. Leaves - Keep collecting leaves for Leaf Mould, even if you think you already have enough, you never do and it's not available to buy on the market.

3. Bare-root  - Aswell as transplanting and planting shrubs etc that I suggested last week now is also the time to start thinking about planting anything bare root. Plants such as Tree's and Roses are becoming available to buy bare root this season and they are often a cheaper option to buy instead of being containerised throughout the rest of the year.
TIP - When planting bare-root make sure you soak the roots in a bucket of tepid water for 24hours as plants may have been dug up hours, days or weeks before you have bought them. Dig a planting hole of a suitable depth and double the width of the plant. Make sure the plant isn't buried any lower than it's original planting depth, you can usually tell what this is as there will be a variation in colour on the main part of the plant.

4. Botrytis - Grey Mould can soon occur daily on areas of plants that were fine the day before, especially on plants under cover. Daily removing of affected areas is important to keep your plants healthy. With the lower temperatures you may not want to open your Greenhouse's but just an hour or 2 of fresh air a day can be extremely beneficial in reducing the risk of this disease spreading, and of course the plants will welcome the fresh air!


Thanks for stopping by, don't forget you can find all the previous Checklists on the page tab above.
HAPPY GROWING!
XXX

Friday 20 November 2015

Problem Area - Plant Pests ... Two Spotted Mite!

Good Morning!
Welcome to my next post related to Problem Areas. Currently I am focusing on Pests!
What exactly is a Plant Pest? 
A Plant Pest gains it's nutritional requirements from the host plant it feeds upon. 
There are various ways which it can gain it's sustenance but broadly speaking it either eats or sucks a plant's sap.
It's a good idea to take note of a pests life cycle as they are more vulnerable at certain stages.

TWO SPOTTED MITE
The Two Spotted Mite is also most commonly known as the Glasshouse Red Spider Mite and is a rather common pest. They are mostly found is Glasshouses / Greenhouses and can be quite a troublesome pest to plants under cover. This is a pest that I personally had a problem with earlier in the year.

Photo from RHS.

A LITTLE BIOLOGY 
The life cycle of a Two Spotted Mite depends on the temperature and can be between 3 - 30 days. The females lay the eggs on the underside of leaves which then hatch into 6 legged larvae. The females can become adults in as little as 36 hours and lay 4 - 8 eggs a day! Their colouring is most commonly red but they can also be a straw / green colour, the red colouring appears when they are starved. The mites can over winter on plants and in the cracks / walls of Greenhouses. 

SYMPTOMS
As the photograph above shows one of the easiest ways to spot them is by their webs. The webs are formed when there is a large amount of the mites.
Damage to foliage on plants is also an indicator of the mites presence as they suck the sap from plants.  Yellow speckled foliage which then leads to shrivelling and death of the leaf is common sign that the mites are present.

Photo from Google.

CONTROL
If like me you like to garden Organically there are a few things you can do -
* Maintaining good plant hygiene by removing any affected foliage straight away
* Keeping Greenhouse structures clean

There is also Chemical control available.

I hope you have found this interesting and helpful if any of you come across this particular pest!
HAPPY GROWING!
XXX

Monday 16 November 2015

Garden Checklist ...

Good Morning!
Here are a few things you can be getting on with over the next week in your garden.

1. Stray Seedlings - If you have spotted any rogue seedlings growing in places that aren't ideal, such as a drive way, you can dig them up and put into a more suitable place or pots until you can find somewhere.
For example I saw that there are some Verbascum seedlings growing on my drive that need relocating.

2. Plant Support  - If you have some supports outside that you are wanting to keep in place over winter it's a good idea to check that they are secure and in good condition before they get damaged by bad weather. We've had some windy days here this last week and these can cause havoc if anything isn't in place properly.

3. Transplant / Plant - I had some Geums growing in Teracotta pots that can't stay outside over winter as they aren't frost proof. This gave me the chance to re-jig my borders and take out some plants that I wasn't overly happy with and replaced them with the Geums.
The soil is still warm enough at the moment for you to do this yourself. 

  • Always make sure that you tease the roots out if they have become root bound and that you have given the plant a good water so that the root ball isn't dry before planting.
  • Firm in plants once they are in the ground, you can use your boots to ensure this is done properly.
  • Make sure you give the plant a really good water when you have finished, even if it's raining! I always give each plant a full watering can of water when I plant them into the ground.

4. Planning - If you've sorted through your seed packets as I suggested recently then you'll probably also be starting to think ahead to next year. Have a think about what you want to grow and start stocking up on the seeds you will need. 
I've started to write a list of the Salad Crops that I want to grow and added them to my wish list!

Thanks for stopping by, don't forget you can find all the previous Checklists on the page tab above.
HAPPY GROWING!
XXX

Friday 13 November 2015

Problem Area - Plant Pests ... Cabbage White Butterfly

Good Morning!
Welcome to my next post related to Problem Areas. Currently I am focusing on Pests!
What exactly is a Plant Pest? 
A Plant Pest gains it's nutritional requirements from the host plant it feeds upon. 
There are various ways which it can gain it's sustenance but broadly speaking it either eats or sucks a plant's sap.
It's a good idea to take note of a pests life cycle as they are more vulnerable at certain stages.

CABBAGE WHITE BUTTERFLY
The Cabbage White is something that can cause real frustration to many gardeners!
As the name suggests they are particularly attracted to Cabbages.

Photo from Google.

A LITTLE BIOLOGY 
A Cabbage White Butterfly starts life as eggs laid on the underside of a cabbage leaf. The larvae then proceed to feed on the host plant. The larva gradually turn into Caterpillars then when they have reached maturity attach themselves to a leaf or stalk to pupate. When the pupae matures the wings become visable and a butterfly emerges.

SYMPTOMS
The larvae and Caterpillars feed on the host plants and damage can be seen on the foliage. The larvae of the Small White feed on the centre of plants on their own. The larvae of the Large White feed in colonies and can cause the most damage.

Photo from Google.

CONTROL
If like me you like to garden Organically there are a few things you can do -
* A layer of protective fleece or film can be laid over your crops creating a barrier preventing the adults laying their eggs. Obviously this is only effective before the pest has arrived.
* Pick off and remove Eggs, Larvae and Caterpillars once spotted.
* Encourage natural predators.

There is also Chemical control available.

* PLEASE NOTE - Try not to confuse the Cabbage White with a different Butterfly species.

I hope you have found this interesting and helpful if any of you come across this particular pest!
HAPPY GROWING!
XXX

Monday 9 November 2015

Garden Checklist ...

Good Morning!
I'm back today with another Checklist, I have decided to now post these on a Monday and the Problem Area posts on a Friday, just incase you thought I'd forgotten about the Checklist yesterday!
Here are a few things you can be getting on with over the next week.

1. Dead Heading - Keep dead heading Winter Bedding such as Viola's, Pansies and Primroses to prolong flowering and to prevent plants setting seed.


2. Tulips  - Tulips need to be planted by the end of this month so if you have any bulbs waiting to be planted, now is the time to do it!

3. Dahlia's- You can choose to lift Dahlia's now or wait until they have been blackened by frost first. You can lift and store the tubers for next year by cutting down the stems to about 2-4inches then carefully digging the tubers up without damaging them. Wipe off excess soil and lower the stems to 1-2 inches then leave the tubers to dry out upside down, for a few days to rid of excess liquid in a frost free location our of direct sunlight. Over winter they can be stored in a ventilated basket or box in moistened sand in a cool, dry frost free place. 
I decided not to store my Dahlia's this year and added them to the Compost bin.


4. Variegated Shrubs - Keep checking that your variegated shrubs do not have plain coloured shoots coming through, cut them out once if you find any to keep the correct foliage.

5. Soil - Dig over vacant areas soils and rid them of any unwanted weeds and moss.


Thanks for stopping by, don't forget you can find all the previous Checklists on the page tab above.
HAPPY GROWING!
XXX

Wednesday 4 November 2015

Problem Area - Plant Pests ... Aphids

Good Morning!
Welcome to my second post related to Problem Areas. 
Last week I started this off by focusing on Plant Pests that we all encounter in our gardens.
What exactly is a Plant Pest? 
A Plant Pest gains it's nutritional requirements from the host plant it feeds upon. 
There are various ways which it can gain it's sustenance but broadly speaking it either eats or sucks a plant's sap.
It's a good idea to take note of a pests life cycle as they are more vulnerable at certain stages.

APHIDS
I'm pretty sure that every gardener has encountered problems caused by Aphids.
These attack plants both outside and undercover. There are many types of Aphids which all have their preferred host plants and particular life cycles but today I am focusing on the one I find most common and encounter the most problems with them inside my Greenhouse. Green and Black aphids are the most common however you can also get them in orange, red and brown.

Photo from Google.

A LITTLE BIOLOGY 
As mentioned earlier each type of Aphid has it's own life cycle. Aphids can breed at an extremely quick rate with each Aphid being able to start breeding at just a week old. They usually spend the Summer on one host plant moving to another for the Winter and you can usually find them on young plant growth as this is what they favour.

SYMPTOMS
Aphids are sap sucking pests so any weakened or distorted growth can be a sign that a plant is undergoing an Aphid attack. This can lead to Virus Diseases being introduced to your plants as Aphids are carriers and help spread disease. Aphids are very common in nursery stock production so always check any new plants that you are considering buying for any signs of Aphids.

Photo from Google.

CONTROL
If like me you like to garden Organically there are a few things you can do -
* Check the undersides of plant foliage and if you find any, simply squash them with your fingers. You can wear gloves if your a little squeamish! 
* Encourage Natural Predators such as Ladybirds who will feed on many of the Aphids.
* Wash away the Aphids with a strong jet of water, however be careful doing this on delicate plants as you can end up blasting petals off!
* Avoid over feeding plants as this encourages soft growth with is particularly vulnerable to Aphids.

There is also Chemical control available.

I hope you have found this interesting and helpful if any of you come across this particular pest!
HAPPY GROWING!
XXX

Sunday 1 November 2015

Garden Checklist ...

Good Morning!
Well I can't believe we're into November already!
Here are a few things you can be getting on with over the next week.

1. Rhubarb - Tidy up Rhubarb plants by simply pulling away any fallen stems that are below 45degrees, they should come away easily from the base with minimum effort. If preferred you can leave them until they have totally died back. Give them a good feed with a mulch but don't cover the crowns as this may lead to rotting. This is best on plants that are 5 years old or younger. If you have older plants you can dig up the crown and divide into separate plants.

2. Seeds - If you find yourself with a rainy day, we've had them all week! Now is a good time to sort through your seed collection, throw out any seeds that are past the expiry date printed on the reverse of the packet. However I do like to get rid of any seeds that are more than 2/3 years old. If you come across a few that you don't plan on using in the future but are in good condition, why not donate to a fellow gardener or local group?

3. Winter Protection- You can provide some winter protection for insects and hedgehogs in your garden simply by making a little shelter for them. I have used a broken pot laid on it's side in a place that doesn't get disturbed too often. I then filled it with a little soil and fallen leaves. Insects and hedgehogs will find their own way in.


4. Hardy Fuchsias - Protect Hardy Fuchsias planted outside from frosts by piling a thick mulch around the base.

5. Astrantia's - Cut down any dying stems on Astrantia plants down to ground level over the coming weeks.


Thanks for stopping by, don't forget you can find all the previous Checklists on the page tab above.
HAPPY GROWING!
XXX

Wednesday 28 October 2015

Problem Area - Plant Pests ... Vine Weevil

Good Morning!
Well as promised here is my first post related to Problem Areas. 
I decided to start this off by focusing on Plant Pests that we all encounter in our gardens.
But first ... What exactly is a Plant Pest? 
A Plant Pest gains it's nutritional requirements from the host plant it feeds upon. 
There are various ways which it can gain it's sustenance but broadly speaking it either eats or sucks a plant's sap.
It's a good idea to take note of a pests life cycle as they are more vulnerable at certain stages.

VINE WEEVIL
Vine Weevil attacks a large range of plants both indoors and outdoors, they are especially common in container plants.
First of all the Vine Weevil comes in two forms, the larvae and the adult beetle.
Here's what you are looking for ... due to me not having this pest personally in my garden (famous last words) I have provided photo's from the RHS website so you know what to look for due to not having any personally.

Photo's from the RHS website.

A LITTLE BIOLOGY 
I won't bombard you with too much information, but here's a brief description of their life cycle.
Vine Weevil over winter outdoors or under un-heated glass as soil / compost inhabiting larvae. Female Weevils (they are all females) emerge during late May / June and begin laying eggs after they've been feeding on plant material for 21-45 days. The eggs hatch within 2 weeks and burrow themselves into the soil. Each female Weevil can lay up to 200 eggs. The Larvae will grow slowly in the soil over the Summer, maturing by Autumn at about 5/8 inch long and will pupate the following Spring. 

Adult Weevils are easier to spot out of the two with them being above ground. However they will hide during the daytime at the base of plants or in mulches as they are shy in nature. Their activity mainly happens at night when they come out to feed on plant foliage. They are slow moving insects that cannot fly, but are good at crawling and climbing.

The Larvae is what causes the most damage out of the two. The Larvae buries down into the soil and eats the roots of plants during Spring and Autumn. In large numbers they can be detrimental to the plant.

SYMPTOMS
An indicator of Larvae in your soil (ground or container soil) will be the condition of the plant. When affected the plant will turn brown, wilt and die. If you lift the plant out of the pot you will notice that the roots have been eaten away.

Adult Vine Weevil chew notches into plant foliage, this can also be an indicator that larvae are present in the soil beneath.

Photo from the RHS website.

CONTROL
If like me you like to garden Organically there are a few things you can do -
* On mild Spring & Summer evening pick the Adult beetles from plant foliage at night. 
Shake affected plants over some paper to dislodge and catch as many as you can.
* In Greenhouses you can check under pots and staging where the adults may be hiding during the day.
* Encourage natural predators such as birds, frogs, hedgehogs and ground beetles.
* Good drainage can be beneficial.

You can gain control over the pest biologically by using Nematodes. 
This is a living bacteria which is watered onto the affected area. Ideally apply this in August / September when the soil is still warm. (5c - 20c) and before the larvae has grown large enough to cause serious damage.
This has been known to be less beneficial in dry and clay soils.
There is also Chemical control available.

I hope you have found this interesting and helpful if any of you come across this particular pest!
HAPPY GROWING!
XXX

Monday 26 October 2015

Problem Area Series ...

Good Afternoon!
I'm just popping by with a short post to let you know about a new aspect to the blog I have decided to start. Seeing as I currently only seem to be blogging a Checklist of jobs you can be doing in the garden each week and the occasional snaps of how things are looking in my garden, I thought it would be a good idea to start a series of posts about problems you can encounter in the garden! It will be something a little more educational for you all.

From Pests to Problems such as Weeds, Diseases and Plant & Envioronmental Disorders I will try to cover a wide range to help you find the best way to combat them in your gardens.
I shall publish the first post later this week, I hope you will pop by for a peek!

HAPPY GROWING!
XXX

Sunday 25 October 2015

Garden Checklist ...

Good Morning!
I hope you all remembered to set your clock back an hour last night! The nights are drawing in and time in the garden is now going to be reduced, but there are still a few things you can be getting on with!

1. Ponds - Remove any dead or dying foliage on pond plants this coming week. If it is left it will rot down into the pond leading to high nitrogen levels, which can encourage blanketweed and algea next Spring. Cut back all falling stems but make sure you do not cut below the water line.
You will also need to remove any annual surface cover plants along with any fallen leaves and keep checking that the water level is at the correct height for your plants over the Winter months.


2. Planting - There's still time to get any evergreen shrubs, hedges and Spring Bedding planted into the ground.

3. Weed Seedlings- Keep on top of any weed seedlings that you spot in your garden, it's best to catch them when they're small as they are much easier to remove then.


4. Display - If you haven't done so already, make a start on your Winter Pot displays! Some bright pops of colour are most welcome in the coming months.

5. Auriculas - If like me you are growing Auriculas you will have noticed over the past few weeks that the leaves are looking a little tatty. Remove any dead or yellow leaves from the plants, make sure you remove the whole leaf from it's base. If a part is left, it can lead to problems with disease.


Thanks for stopping by, don't forget you can find all the previous Checklists on the page tab above.
HAPPY GROWING!
XXX

Sunday 18 October 2015

Garden Checklist ...

Good Morning!
Here's a few things you can be doing in your garden over the coming days.

1. Lawns - Autumn is the time to give your lawn a little bit of maintenance! One of the things you can do after mowing is give it a good rake through to remove any moss that has built up, trust me there will be soon! This will improve the health of the lawn. You can also aerate it with a fork and remove any weeds you see growing through.

2. Planting - Autumn is a good time to get plants in the ground before winter. The ground is still warm over the next couple of weeks so if you have any evergreens, hedging or shrubs sitting around waiting to be planted, now is the time to do it.
On the flip side of this now is the time to dig up and move any tender perennials that need protection of winter before the frosts come! We've already had a couple of light frosts this week.
You can also lift and divide any congested Perennials and re-plant in various areas of the garden!

3. Healthy Plants - To keep your plants healthy keep checking them over for anything that can prevent them happening. For example as you can see below there are some faded flower stems that need pulling out and a sneaky snail that has climbed into one of the flowers!

Alstroemeria - Inca Ice 'Koice'

4. Harvest - Plants such as Chilli's are still ripening and ready to harvest, snip them all off once they are ready and store in a freezer if you won't be using them right away.


5. Over Wintering - If like me you are over wintering various plants, I like to reduce them in size around about now, such as with my Pelargoniums. In my personal experience I find by reducing the amount of foliage it helps prevent the chances of grey mould, which in a bubble-wrapped greenhouse can occur quickly. It also reduces the amount of water the plant needs to take in and the energy it uses. You can also re - pot into smaller pots if you are tight on space.


6. Roses - Keep collecting fallen rose leaves from around the plants base, especially if they are affected with blackspot. If they are left the spores can lay in the ground and raise the chances of the plant getting blackspot next year. 

Thanks for stopping by, don't forget you can find all the previous Checklists on the page tab above.
HAPPY GROWING!
XXX

Tuesday 13 October 2015

My Autumn Garden ...

Good Morning!
It's been a while since I shared some full garden photographs so I thought it was time to show how it was looking so far this Autumn!
First up is the front of the house which had a little tidy up last weekend ready for the winter months! As you can see the Perennials I planted a few months ago seem to be doing well.


As soon as you walk through the gate your on the large patio area (if this was my house this would've been halved in size and planted up lol) but unfortunately due to renting it has to stay put! There is a large Raised Bed which is currently playing host to some Dahlia's. They're a little past their best but the bee's are still enjoying them so are staying put a little longer!


In the gap between the raised bed and the lawn is a small stretch of patio that I've filled with some Primroses and next to them are some Penstemons planted in a small border. 


Back on the patio lining the stretch from the gate along the conservatory is a display of pots.


The shady spot at the other side of the conservatory that currently only see's about an hour or two of sunshine is looking colourful thanks to the Sedum. 


Next to this shady spot is the second part of lawn which is on the same side as the Greenhouse.


Infront of the Greenhouse is my little pond and another small border.


Finally here's a few snaps from inside the Greenhouse!


Thanks for stopping by,
HAPPY GROWING!
XXX