...

Saturday, 9 April 2016

Garden Checklist ...

Good Morning!
Here's a few things that you can be getting on with over the weekend in the garden ...

1. Seedlings  - If you're sowing plants from scratch, once they have germinated and developed their true leaves it's time to pot them on. When doing so always make sure that you handle the seedlings via their leaves and not the stems. Pot them on into either small pots or plug trays, multi purpose compost is fine. Once pricked out place them somewhere light and warm but out of direct sunlight for the first 3 or 4 days to prevent the seedlings being scorched by the sun.


Marigold 'Vanilla Cream'

2. Protect - New shoots of Delphiniums and Lupins will be pushing through the ground and they need a little bit of protection from slugs as they have a particular fondness for them! A simple way of protecting them is by using copper rings around the young plants as slugs won't climb over them.

3. Spring Bulbs - Spring bulbs such as daffodils will be coming to the end of their flowering. Once the blooms have faded they need dead heading so that the plants energy can go back into the bulb. Dead-head daffodils by snapping the heads off between your fingers on the green part of the flower stem about 1cm below the brown part that you can see below. 


4. Root Prune - If you are growing permanent pots, such as Tree's or large shrubs in containers and haven't checked them for the past couple of years now is the time to do so. 
Once you have removed the plant from it's container, start by scraping away the top layer of compost and ease the plant out gently (this may take 2 people depending on the plant size) and check the root growth. If the roots have completely filled the container and you don't have any pots larger than the one it's in you can prune some of the roots off with secateurs. 
This won't damage the plant. 
Add some fresh compost into the bottom of the container so that the plant has something to grow into and re pot. To avoid air gaps you may need to use a stake to push the compost down the sides and make sure that you plant to the same soil level as before. Finish with a mulch of gravel.

5. Support - Large growing Perennials will be putting on good growth in the coming weeks and some need support to prevent them falling over later in the season. Position your supports now so that the new growth can grow into the the supports giving them a more natural look, Plants with supports placed after heavy rainfall and winds have already done their damage never look as good as those with supports that have been there all along! Once the plants have grown the supports will no longer be visible so if your not a fan of how they look don't worry, you won't have to look at the supports for long.

Thanks for stopping by, don't forget you can find all the previous Checklists on the page tab above.
HAPPY GROWING!
XXX

Friday, 1 April 2016

Project - Something For The Weekend ...

Good Morning!
Today I thought I'd share something a little different to usual, It's a project for anyone to try whether they're a beginner gardener or more experienced! All you need are the following items from the list below, for the plants I've chosen to use for this display I preferred to use a shallow container.

WHAT YOU NEED -
* Pot / Container
* Potting Grit & John Innes no.2 Compost
* Sempervivum & Echeveria elegans (easily available from Garden Centres)
TIP - These plants produce 'off sets' which can be easily removed and placed into individual pots producing extra plants at no extra cost! In fact all the plants I have used today were one's that I propagated myself last year from just one plant of each type.

The above plants need good drainage so before planting up the container place a crock over the drainage hole and add a good layer of Potting Grit. 


Mix some John Innes no.2 Compost with some Potting Grit and place this on top of the bottom layer.
To get an idea of how many plants you can fit in before planting up empty each plant from it's pot and place in the container. Try not to place the plants too close together as they need a little space to grow.
TIP - Ensure plants are well watered before planting up into a display. For the plants mentioned in today's post place them on a saucer and water them from the bottom instead of overhead.


Fill in the gaps between plants with another mix of grit and compost, firming in as you go. 


Finally add a top layer of Potting Grit and remove any stray pieces from the surface of the plants. This can be a little fiddly so using an old soft toothbrush gently may work better than your fingers, however be careful not to scratch the surface of the plants too much.


The plants in today's display are hardy and can cope with low temperatures, but not the wet. 
This display would be perfect for the middle of a patio table now and during Summer as the height won't be disruptive amongst guests or block a view! 
However if rain is predicted do pop them under some form of cover to avoid it falling on the plants, which can lead to them rotting. When it comes to watering do as I suggested earlier and place the container onto a saucer. Water from beneath moderately and not at all when they are dormant in winter.
It's the perfect display for anyone that tends to forget to water their plants!

TIP - Once the plants start to produce off sets and look a little crowded in the container, remove the newly formed offsets and pop them into individual pots. Not only will this give you extra plants for another display but it also keeps your display looking at it's best!

If you decide to give this display a go yourself why not share some photo's of it with me?
HAPPY GROWING!
XXX

Monday, 28 March 2016

Garden Checklist ...

Good Morning!
I hope you have all had a lovely Easter weekend, typically we have torrential rain today so it doesn't look like I'l be able to do anything in the garden!
However if the weather is fine where you are here's a few things that you can be getting on with today and over the rest of the week ...

1. Transplanting  -If you have plants in the wrong place or they've simply grown too big for the space that they are in now is a good time to dig them up and relocate them. Avoid doing this however if the ground is frozen or water logged. If your wanting to move a plant but don't have anywhere for it to go then pop it in a pot until you have found the right place.
Below you can see that I have taken out the Hardy Fuchsia which was in the middle to the right and moved the Salvia to the centre as it has put on some good growth since I first planted it. I finished the spot off by under-planting with some Snowdrops and the Fuchsia has been relocated elsewhere in the garden!


2. Sowings - Now is a good time to get on with some more seed sowing! For example yesterday I sowed some Cosmos 'Xanthos' and 'Double Click Snow Puff' along with some French Marigolds in 'Vanilla Cream' and 'Spanish Brocade'. 
There's also still time for you to sow Greenhouse crops such as Peppers, Cucumbers and Tomatoes.

Cosmos 'Xanthos'

3. Strawberries- If you are growing Strawberries outside you can encourage early fruits by covering the rows with Cloches. Alternatively you can grow them undercover in a Greenhouse which will also encourage early fruits! This year I am growing 'Mara des Bois' which is a perpetual strawberry so hopefully I shall have more strawberries for longer throughout the year!


4. Potatoes - If you are growing Potatoes this year then the Easter weekend is traditionally the time to get them planted. If you are limited on space but want to grow this crop then large bags with drainage holes and containers can also be used. Ensure when planting that each seed potato has healthy shoots and give the soil a water after planting.

5. Dahlia Tubers - Dahlia Tubers can also be started off now. Plant them in pots of multi purpose compost and place in a cold frame or Greenhouse. Once you spot them green shoots emerging from the soil give them a water.

6. Basket Plants - Garden Centres will be getting in plug plants of Basket plants now, if they haven't already! If your only wanting a couple for your Summer Bedding this year then it's a great way of getting just a couple for a cheap price. Of course it's still too cold for them to go outside so it's best to keep them in a Greenhouse right now. Pot them up into 9cm pots of multi - purpose compost as soon as you get them home. Once they have filled these pots you can plant your baskets / containers up and keep them undercover until it's time to go outside.
One of our nearby Garden Centres has them on offer for 6 for £5 so of course I had to pick up a few!


Thanks for stopping by, don't forget you can find all the previous Checklists on the page tab above.
HAPPY GROWING!
XXX

Wednesday, 23 March 2016

Plant of the Month ... Pulmonaria!

Good Morning!
I started this series last month and today I am back with the next instalment.
The PLANT OF THE MONTH for March is ... PULMONARIA!

Pulmonaria (or Lungwort) is an attractive early flowering Hardy Perennial which provides eye catching colour at this time of year and will continue well into Spring. Perfect for woodland areas, flower borders and beds the clump forming perennial also provides ground cover throughout the year.
The variety I have and I am sharing photo's of below is called 'Silver Bouquet' but there are also other variations in strictly blue, pink and even white.
This plant is ideal for a first time gardener as you can pretty much leave it to itself for most of the year!


CULTIVATION 
Pulmonaria are ideally planted in either a North, East or West facing sheltered position and are happy on moist well drained soils that are chalky, clay or loam in part shade. The ultimate height and spread of this plant in approx 2-5 years is 0.5-0.5 metres.
Any tattered leaves should be removed after flowering and you can divide the plant every 3 - 5 years at this time or later in Autumn.


PROBLEMS
Pulmonaria can be prone to 'Powdery Mildew' during dry weather conditions. You can find more info on this particular problem at the top of the blog under the
'Problem Area - Plant Diseases' tab.
If your Pulmonaria is affected by this cut the plant down to ground level, feed and water,
the plant will produce new foliage later in the year.

HAPPY GROWING!
XXX

Saturday, 19 March 2016

Garden Checklist ...

Good Morning!
Here's a few things that you can be getting on with in the garden over the coming week ...

1. Spring Bulbs  -If you had any leftover bulbs from last Autumn that you potted up into small pots then now is the time to find a spot for them. You could simply put them together into a decorative pot as a focal point or use them to plug any gaps in your borders!


2. Herbs - Fresh herbs are important in the garden if you like to cook or simply love the scent. Right now Garden centres have small pots of herbs at an extremely low price so now is the time to get stocked up! I recently purchased some Apple & Chocolate Mint, Hot & Spicy Oregano, Marjoram and my favourite of them all ... Lemon Thyme. 
Pot them up into pots the next size up and finish with a layer of grit.


3. Soil - If your hoping to get started on sowing direct soon then it's worth helping your soil to warm up. You can use Cloches or if you don't have any a layer of fleece, I have kept mine in place with plant stakes.


4. Pests - This may be something I mention a lot but it really is worth checking daily for pests in a Greenhouse. As you can see here some Aphids have taken a liking to one of my Fuchsia's! The easiest way to deal with this is to squish them with your fingers!


5. Re Potting - If you have permanent containers featuring Shrubs / Evergreen it's worthwhile re potting them every 2 or 3 years into fresh compost. The easiest way to do this is to scrape away the top layer of compost and ease the plant out of the container. Pot them on into a pot slightly larger if the roots have filled the previous container, not forgetting a layer of crocks at the bottom. Use John Innes no.3 or Ericaceous compost if the plant prefers acidic conditions (such as Hydrangeas, Rhododendrons). 
I also like to add a little Fish, Blood and Bone into the mix to give the plants a bit of a boost! Water well and cover the surface with a layer of Horticultural Grit to prevent weed seedlings .... plus it's a nice finishing touch!


4. Borders - This time of year is also a good time to get any borders mulched that you didn't get the chance to do in Autumn. You can use good quality garden compost or composted bark. I always like to mix in a little Blood, Fish and Bone in too to give the plants a Spring feed. 
This also gives you a chance to see if there are any gaps that could be filled with Spring flowering bulbs instead of just having bare spaces of soil next Spring! You can also remove any plants that you're not overly happy with any more which is something I will be doing after looking at the below photo lol
NOTE - Always mulch when the soil is moist, never dry.


Thanks for stopping by, don't forget you can find all the previous Checklists on the page tab above.
HAPPY GROWING!
XXX

Wednesday, 16 March 2016

Wakey Wakey ...

Good Morning!
Apologies yet again for the blog being so quiet over the past couple of weeks. Due to work and undesirable weather conditions I haven't really been able to do much in the garden! We did however get a couple of days sunshine recently (although now it seems to have greyed back over) which seems to have helped wake the garden up! There will be more details on the jobs I managed to do during this brief spell of sunshine but I am saving it for this weekend's Garden Checklist.

Today I thought I'd share some snaps of how the garden is looking now, some plants are starting to wake back up and I've had a little bit of a shuffle around. 
The first and biggest change you will notice though is that there is a new addition .... 
a cold frame!
Made with some left over wood from the raised bed and a second-hand pane of glass, my Dad managed to fit it all together at the end of the raised bed. You can open the lid at different stages via the metal at the front or hold the lid back completely with some chain on warmer days. It's currently housing my Auriculas and potted Herbs, the auricula's don't like too much rain and the pots the herbs are sitting in aren't frost proof!


I've also moved the eyesore of the bins to the driveway and replaced the area with some large potted shrubs which makes the sitting area a much more pleasant place to sit! 
The Ribes in the centre is starting to form it's flowers and I can't wait for the perfume to arrive.


The various pots of plants near the raised bed have been repositioned and you will spot that the Belfast sink is still waiting to be planted up ... I have some of plants that I intend to use but they need to produce a little bit more growth before I plant them in position.


The pots next to the conservatory have been reduced and just like above I am waiting for some of the smaller ones at the front to produce more growth before I will be completely happy with how they look.


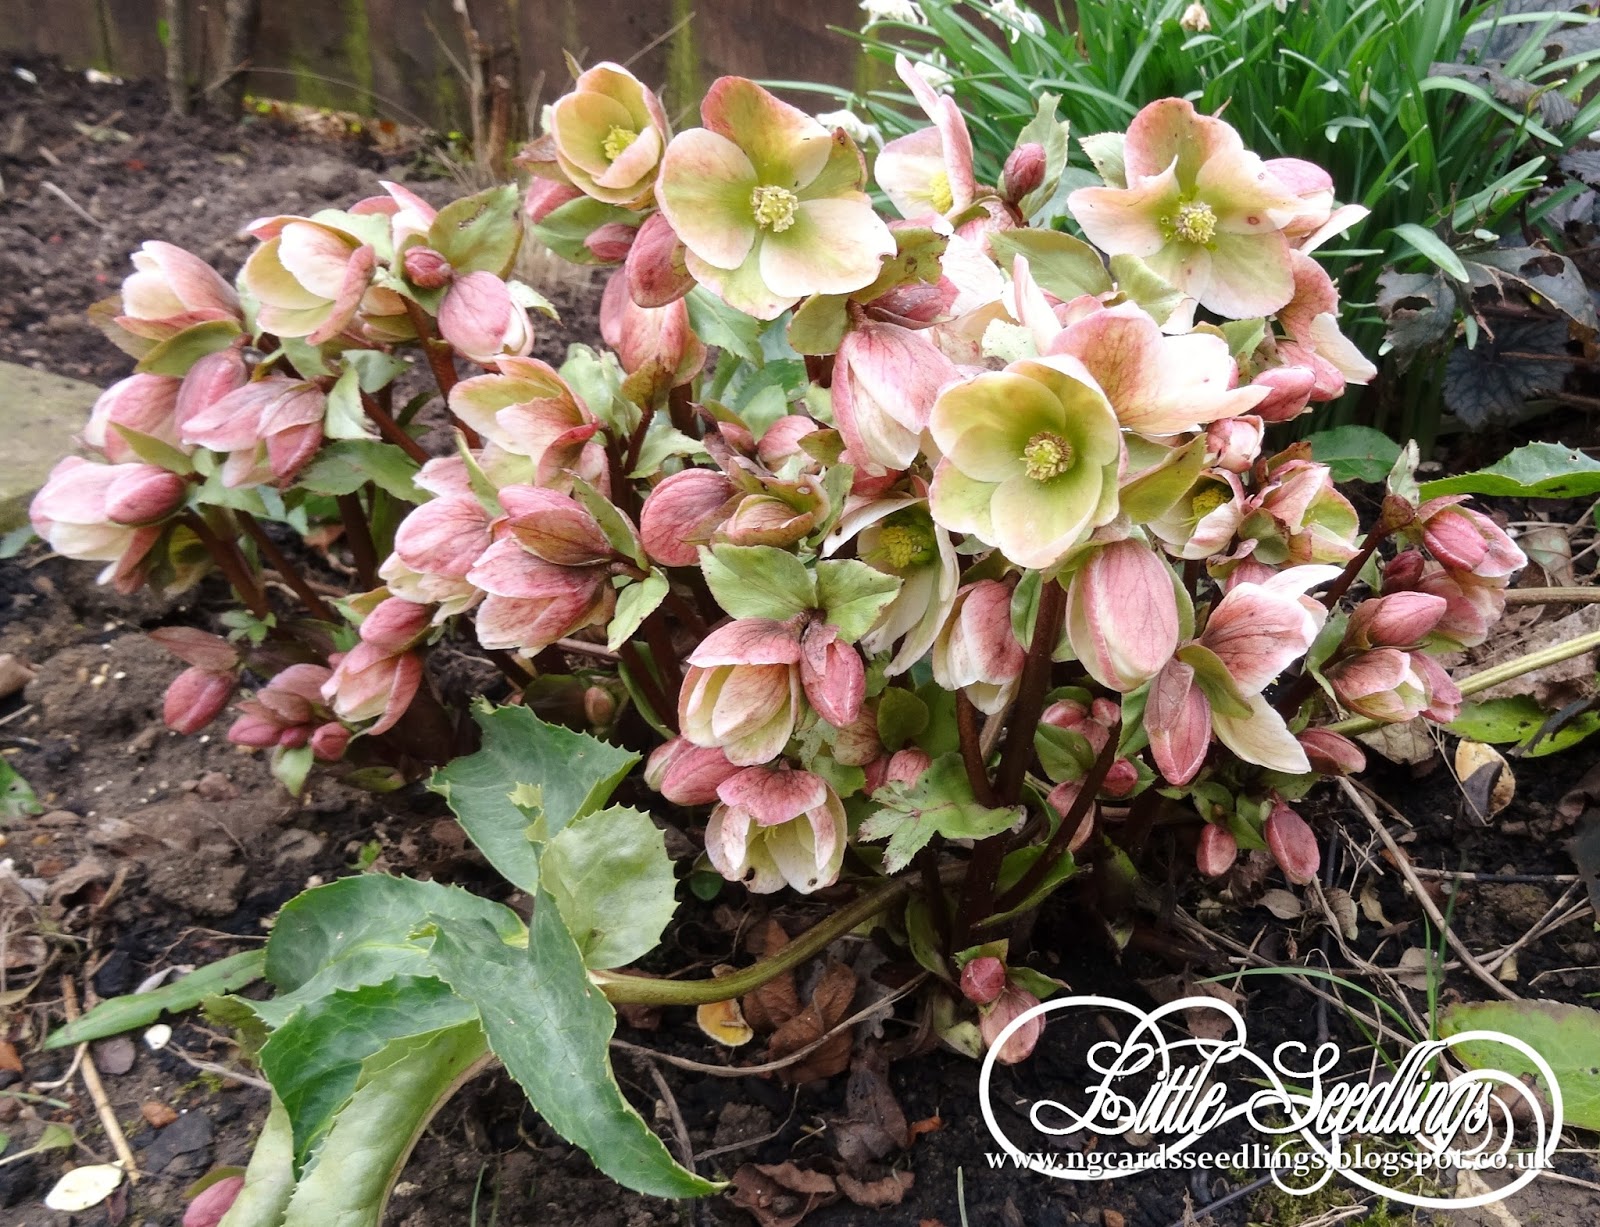
Finally the Hellebore's are producing some pretty and colourful blooms. One of the things I love about these plants is that the faded blooms look just as beautiful as the new ones!


Thanks for stopping by, I'l be back on Saturday with the next Garden Checklist!
HAPPY GROWING!
XXX

Wednesday, 9 March 2016

Problem Area - Plant Diseases ... Damping Off!

Good Morning!
Plant disease is a fungal, bacterial or viral organism which interferes with the normal growth rate of plants, producing visible symptoms that reduce economic or aesthetic quality.

The focus of today's post is a Fungal Disease and these have visible symptoms such as -
Leaves producing spots, wilting & curled leaves, dieback, enlargements (galls) and stunted / dead plants. Some fungi's produce other visible signs such as rusts, mildew & sooty moulds.

DAMPING OFF
Damping off is an extremely common problem during the upcoming weeks as gardeners start their seed sowings! Damping off can affect most seedlings and is caused by several soil-borne Fungis.
Photo from Google

SYMPTOMS
Here are a few things you can look out for ...

- Attacks young seedlings, specially those grown under glass. This is particularly common if the seedlings are in areas of high humidity and poor ventilation, along with thick amounts of sowings.

- Failure of seeds germinating.

- Seedlings collapse, often white fungal growth is visable.

PREVENTION 
Here are a few things you can do to help prevent this ...

- Ensure seed sowing compost is fresh and of a good quality. Also make sure that any seed trays or pots are cleaned before use and hasn't been used with sowings that have succumbed to damping off before.

- Sow your seeds thinly.

- Use mains water when possible to water seedlings and do not over water.

- Enusre seedlings have good ventilation to reduce humidity.

I hope you have found this helpful.
HAPPY GROWING!
XXX