Showing posts with label Raised Bed. Show all posts

Saturday, 21 May 2016

Garden Checklist ...

Good Morning!
Here's a few things that you can be getting on with this weekend in the garden ...

1. Hardening Off  - Summer Bedding plants will be putting on good growth now and no doubt you'll be itching to get them in their final positions outside! However they need to go through a process of 'Hardening Off' first before going outside permanently. This is to acclimatise them to the outdoor temperatures and conditions as they will have been protected under cover whether you've kept them in a Greenhouse or just bought them from a Garden Centre.
Pop them somewhere sunny & sheltered during the day time for 7 - 10 days, bringing them back undercover on a night when the temps drop for the first 7 days then leaving outside still in their containers for the remaining days.
Of course if cooler temperatures and frosts are forecast (this is still possible until the first week of June) protect with a layer of fleece, I always hold off planting out in final positions until the risk of frost has passed.

2. Primulas - If you have Primulas and Primroses growing in your garden the clumps can become congested over time. Now is the chance to lift and divide them, removing offests which can be used to provide new plants for yourself, replanting elsewhere around in the garden or in pots until a later date.

3. Lawns - It's time to give the edges of lawns a good tidy up.
Over the recent months lawns edges may have lost their neatness and slowly crept into the neighbouring soil. All you need to do is get a spade or edging tool and cut in around the edges. 
Even if it's the only thing you do in the garden this weekend it instantly makes your garden look ten times neater!


4. Protect - Protect young salad and veg crops from Pests and being snacked on by Birds. 
All I have done in regards to my Raised Bed is covered the surface with some Butterfly Netting held above the plants tightly (allowing space within for them to grow) with wooden stakes.


5. Winter Bedding - I know it may seem wrong to even starting thinking about Winter, but now is the time to start deciding about what Bedding plants you would like to have later this year. If you are wanting to grow from seed plants such as Pansies the time to start doing this is over the coming weeks.

Thanks for stopping by, don't forget you can find all the previous Checklists on the page tab above.
HAPPY GROWING!
XXX

Saturday, 19 March 2016

Garden Checklist ...

Good Morning!
Here's a few things that you can be getting on with in the garden over the coming week ...

1. Spring Bulbs  -If you had any leftover bulbs from last Autumn that you potted up into small pots then now is the time to find a spot for them. You could simply put them together into a decorative pot as a focal point or use them to plug any gaps in your borders!


2. Herbs - Fresh herbs are important in the garden if you like to cook or simply love the scent. Right now Garden centres have small pots of herbs at an extremely low price so now is the time to get stocked up! I recently purchased some Apple & Chocolate Mint, Hot & Spicy Oregano, Marjoram and my favourite of them all ... Lemon Thyme. 
Pot them up into pots the next size up and finish with a layer of grit.


3. Soil - If your hoping to get started on sowing direct soon then it's worth helping your soil to warm up. You can use Cloches or if you don't have any a layer of fleece, I have kept mine in place with plant stakes.


4. Pests - This may be something I mention a lot but it really is worth checking daily for pests in a Greenhouse. As you can see here some Aphids have taken a liking to one of my Fuchsia's! The easiest way to deal with this is to squish them with your fingers!


5. Re Potting - If you have permanent containers featuring Shrubs / Evergreen it's worthwhile re potting them every 2 or 3 years into fresh compost. The easiest way to do this is to scrape away the top layer of compost and ease the plant out of the container. Pot them on into a pot slightly larger if the roots have filled the previous container, not forgetting a layer of crocks at the bottom. Use John Innes no.3 or Ericaceous compost if the plant prefers acidic conditions (such as Hydrangeas, Rhododendrons). 
I also like to add a little Fish, Blood and Bone into the mix to give the plants a bit of a boost! Water well and cover the surface with a layer of Horticultural Grit to prevent weed seedlings .... plus it's a nice finishing touch!


4. Borders - This time of year is also a good time to get any borders mulched that you didn't get the chance to do in Autumn. You can use good quality garden compost or composted bark. I always like to mix in a little Blood, Fish and Bone in too to give the plants a Spring feed. 
This also gives you a chance to see if there are any gaps that could be filled with Spring flowering bulbs instead of just having bare spaces of soil next Spring! You can also remove any plants that you're not overly happy with any more which is something I will be doing after looking at the below photo lol
NOTE - Always mulch when the soil is moist, never dry.


Thanks for stopping by, don't forget you can find all the previous Checklists on the page tab above.
HAPPY GROWING!
XXX

Thursday, 23 October 2014

Make A Feature ...

Good Morning!
Today I thought I'd share a few little jobs that I did this week and so could you. 
First up I wanted to make a little feature, nothing too fancy or fussy, just something to fill the gap where the patio table goes in summer otherwise I'm left with a massive empty space of patio! All I did was have a re-shuffle of some outdoor pots and placed some of various sizes in the spot. I will most likely change around what's here but for an instant effect it works well.


You can also spot a new addition which I couldn't resist on a Clearance table at the Garden Centre last week. It is called 'Salvia - Royal Bumble' it's hardy and has lovely flowers, although in windy weather they aren't the easiest to photograph! lol


I also treated myself to this 'Echeveria - Lilacina' which is a lovely shade of grey with a pink tint.


This week I also planted out the rest of my Autumn / Winter Bedding which includes trailing Viola's ...


Primroses & Bellis were also planted in my side border along with a couple of left over Wallflowers and the border was also given a mulch of compost.


More bedding was used around the edge of the Raised Bed just to help it to not look too bare.


TIP - As you can see here you don't have to always hang Hanging Baskets up. They make great containers too!


Thanks for stopping by,
HAPPY GROWING!
XXX

Wednesday, 16 July 2014

Vegetables & Chrysanthemum's ...

Good Morning!
If you remember a week or so I received my Chrysanthemums for the Autumn? Well it was time to plant them out into their final positions after rooting around the 9cm pots I pricked them out into. 
This year I have decided to plant them in the Raised Bed as I'm not too keen on Winter Vegetables and I didn't want the space to go to waste.  Plus it will be a great colourful feature in the centre of the garden when everything else is fading! Before planting out I prepared the soil by hoeing over it to remove all the weeds.


When planting out Chrysanthemums they need to be positioned approx 30cm apart. The spacing is slightly less between mine but not too far off. I always like to position them in their pots whilst organising the layout before planting out.


I had two of each colour and distanced them both apart from each other, however I kept the labels with the plants for each so that I still know what variety they are.


After about 10-14 days when the plants have grown a bit larger I will be adding stakes as a support.
Below the Raised bed you can see the 6 Anastacia Green Chrysanthemums in pots, this is because they are an indoor variety which will need to be lifted into the Greenhouse when the first frosts arrive.


Thanks for stopping by,
HAPPY GROWING!
XXX

Monday, 14 July 2014

Weekly Garden Checklist ...

Good Morning!
It's Monday so it is time for another Weekly Garden Checklist. 
Incase this is the first time you have seen this particular themed post, it's a quick list of jobs you can be doing in the garden this week.
Let's get started!

1. Take Pelargonium Cuttings - Now is the perfect time to start taking cuttings from your Pelargoniums for next years plants or just to make sure you have a back up! To do this all you need to do is take some cuttings from new non-flowering shoots and put them into some pots of compost & vermiculite. Place somewhere light but not in direct light and within a few weeks they should have rooted!


2. Keep Sowing Vegetables - Although we are getting into Summer don't stop sowing! There are plenty of vegetables you can be sowing now for your salads such as Lettuce, Spring Onions, Radishes, Chard and plenty more. Sow direct  in 2 / 3 weekly batches to ensure a constant supply.
Here you can see some Lettuce seedlings next to my Leeks along with a patch above the Lettuce where I have sown some S.Onions & Radishes.


3. Sow Next Years Flowers - Carrying on the subject of sowing, now is the perfect time to get sowing for next year. Plants such as Foxgloves, Delphiniums & Lupins need to be sown now for flowers next year.


4. Keep Pinching Out Cordon Tomatoes - Ensure that you keep on pinching out tomato side-shoots, keep checking everyday as if left alone they can soon grow and take up the plants energy. Also tomatoes are ripening now so make sure you pick them and enjoy!


5. Maintain your Greenhouse - With all this hot weather it is important to make sure that you keep on top of GH. Damp down the floor on hot days by spreading water floor in the morning and leaving the vents / windows fully open. You can also keep the door open on warm nights.
Also to help fight again GH pests hang yellow sticky traps for whitefly & Aphids.

I hope you have found this Checklist helpful!
Thanks for stopping by,
HAPPY GROWING!
XXX

Saturday, 24 May 2014

A Little Bit Of Sunshine ...

Good Morning!
A little bit of sunshine goes a long way and judging from the past few days the plants have lapped it up! Although as you are reading this the weather has turned back to rain but atleast it gives everything a good water! 

Let's start off with the Patio table next to the Veg bed where I have arranged a selection of Nemesia & Diascia in the centre as a focal point.


We have also had our first harvest from the Veg Bed which is one of the Radishes! The Spring Onions don't look too far off either so hopefully we will have a few things to harvest this weekend.


The veg bed now has some netting over it (added since taking this photo) to help stop the birds pecking at the lettuce and the Alliums are still providing a great border.


Against the veg bed you can see the 'Abutilon' and the Iris's have finally flowered!


Last weekend I tidied up one side of the lawn by extending the beds a bit more which will be planted up with Annuals to fill the gaps. You can see the Geum's and Aquilega's are bursting with colour!


In the Greenhouse my Pelargoniums are starting to show their blooms ...


The 'Black Cherry' Petunia has also started coming into flower and I love the deep richness of the red.


Finally the Clematis at the front of the house we planted last year is still only very small but one of it's buds flowered this week and the 'Bee's Jubilee' is definitely the bee's knees!


Thanks for stopping by, I hope you have a great weekend!
HAPPY GROWING!
XXX

Tuesday, 6 May 2014

Re-Potting Sempervivums & More ...

Good Morning!
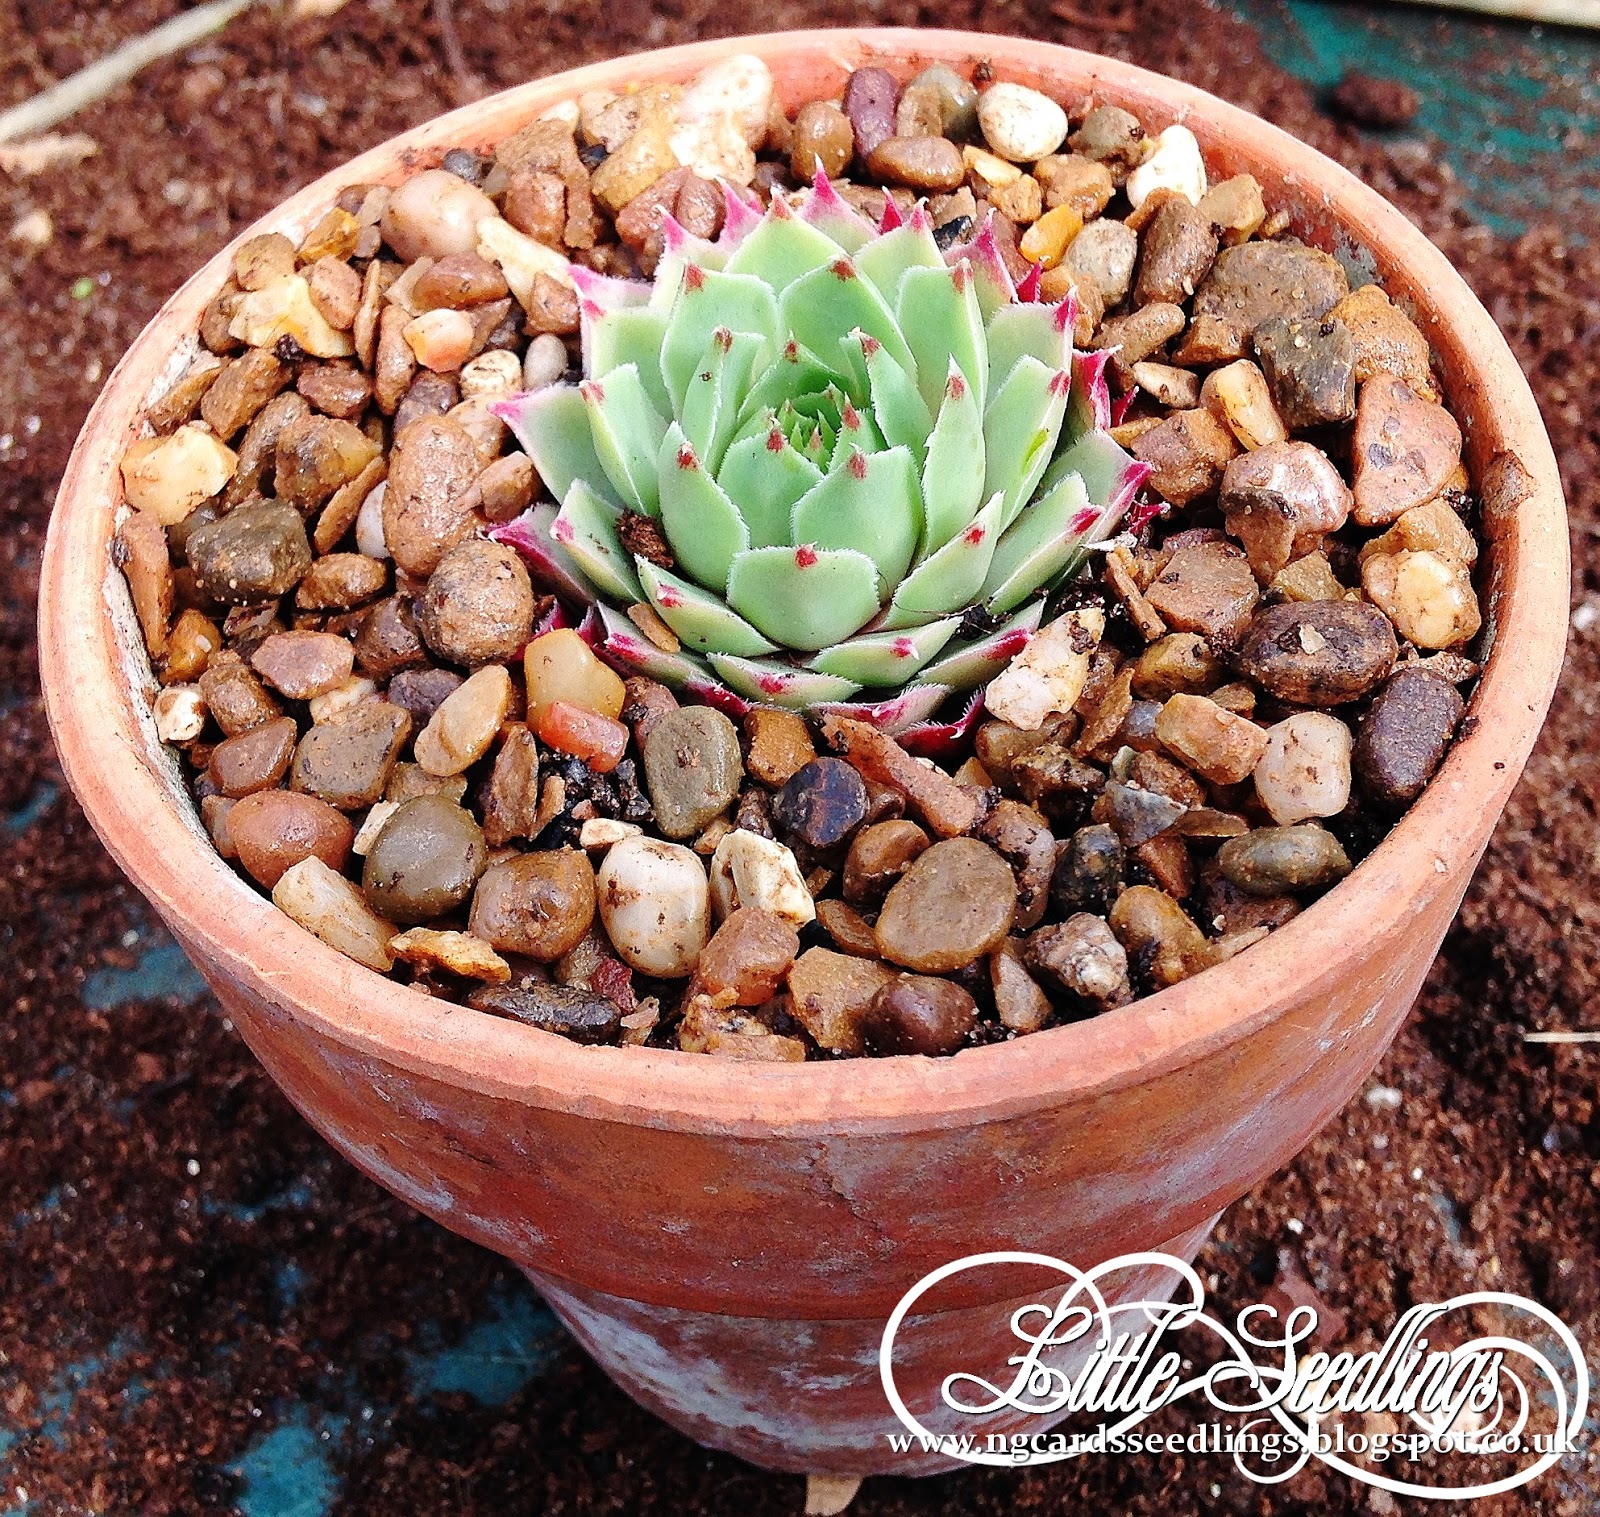
Back on Sunday I spent the afternoon re-potting some plants, most of them needed some fresh new compost and the Sempervivums, well you can see for yourself ...


Each of the heads of this plant can actually pulled out to form a new individual plant. Which is exactly what I did!


Sempervivums thrive in rock garden so just like I did with Auriculas  I re-potted them into teracotta pots with a mix of soil - based compost (John Innes no.2) & grit.


I also re-potted this Fuschia which was actually a cutting I took last summer. Seeing that I want to keep my Fuschias in pots permanently I have used John Innes no.2 instead of Multi-Purpose.


The Pelargoniums were re-potted into larger pots and fresh compost.


Lastly here's a look at how the Raised Bed is looking seeing it's been a while since I last shared it. As you can see I have added some Brocolli & more Lettuces to the left, the Radishes have germinated (thinned to 1 inch spacing) and the Spring Onion are doing well on the far right.


The Alliums have also shot up even taller than before and I can't wait for them all to open!


Thanks for stopping by,
HAPPY GROWING!
XXX

Wednesday, 23 April 2014

Catching Up ...

Good Morning!
In my Greenhouse the Tomatoes have certainly put on a lot of healthy growth, 2 of which in particular! I have a selection of varieties growing this year but the 'Sungold' seem to have shot ahead of the others. They're actually large enough to pot up into their final pots (although I don't have the space for this yet lol) but I managed to fit them in, just! I always use large plastic pots for my Tomatoes but there are a variety of other ways to grow them.


TIP - When planting tomatoes make sure you bury the plant right up to it's first set of leaves.


Over the past weekend I also finally managed to put something into my raised bed. Although there's not much in there atm there is more stuff to go in, but it's just not ready yet. So far there are some Spring Onions, Lettuce and a row of Radish seeds.


In the Garden I noticed that finally my Astrantia's are starting to show through the ground, I had to share as I was starting to give up hope on seeing these again seeing they were taking so long!


Both of my new Apple Tree's are coming into leaf ...

'Tickled Pink'

'Cox's Orange Pippin'

Remember those Grass plant plugs I shared a few weeks ago? Well they were ready to put up into some larger pots and are starting to put on some healthy growth, I think the 'Carex - Frosted Curls' (first on the left) is my favourite of the four so far. I shall have to get a better photograph of them each sometime for you all as this one doesn't do them justice!


Thanks for stopping by,
HAPPY CRAFTING!
XXX